
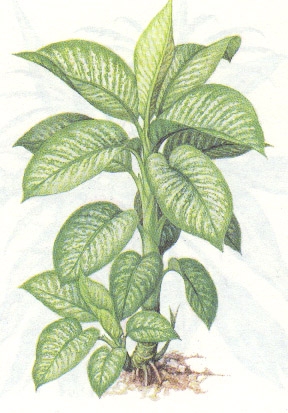
Dieffenbachias (dumb-cane, dumb-plant, tuftroot, leopard lily) are highly decorative foliage plants, some of which can grow over 5 feet tall indoors. Their thick, canelike and unbranched stems carry rather soft and fleshy leaves on sturdy, sheather stalks. The leaves generally spread outward and arch slightly downward. Although those of most species and varieties are basically green, some are so densely marked with yellow or white that the central area often seems to be oe large patch of pale colouring. As dieffenbachias age, some of the lower leaves dry up and fall off or may be pulled off, leaving behind a scarred stem, which gradually lengthens. But the bare stem is likely to be at least partially hidden by the thick crown of downward-arching leaves. Mature plants may produce white or cream-coloured typical arum flower heads, but these are of little interest.
Proper Care
Light
Provide bright filtered light in spring, summer and autumn. During the short-day winter months the brightest possible light, including direct sunlight, is best.
Temperature
Dieffenbachias need warmth and cannot tolerate temperatures below about 60°F. High humidity is also essential; plants should be stood on trays of damp pebbles.
Watering
Water moderately, enough to make the entire mixture moist, but allowing the top inch of the mixture to dry out between waterings. In a suitably warm position these plants continue to grow throughout the year and will need the same type of watering at all times.
Feeding
Give actively growing dieffenbachias standard liquid fertiliser every two weeks.
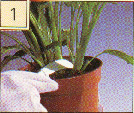
Potting and repotting
Use a soil based pottig mixture. Move small plants into pots one size larger every spring. An 8-inch pot is likely to be the biggest needed. If larger specimens are desired, move plants on every other year until a 10 or even 12-inch pot is reached.
Propagation
A tip cutting 3-6 inches long will root at atemperature of at least 70°F if taken in spring or early summer. Take the cutting immediately below a node, strip off the lower leaves, dip the cut end in a hormone rooting powder, and plant it in a 4-inch pot containing a moistened equal-parts mixture of peat moss and coarse sand or perlite. Enclose the whole in a plastic bag or heated propagating case, and keep it warm in bright indirect sunlight. When the potted cutting has rooted (in four to six weeks) remove it from the bag or case, water it moderately, and apply standard liquid fertiliser at two-week intervals. Move the cutting into a 5-inch pot of standard mixture and treat it as a mature plant when it begins to fill the pot with roots.
It is also possible to propagate a dieffenbachia from a 3 or 4-inch long section of the main stem. Take a section containing at least one growth bud, place it horizontally on the surface of a moistened equal-parts rooting mixture of peat moss and coarse sand or perlite, and treat it as a newly planted tip cutting. A dieffenbachia can also be air layered.
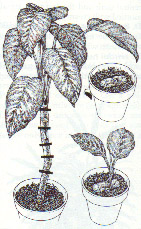
[lay a section of main stem containing at least one growth bud on the surface of a pot of damp rooting mixture. New growth will appear from the growth bud]
Special points
Be sure to wash your hands thoroughly after removing faded leaves or taking cuttings from dieffenbachias. The sap is poisonous. If it gets in the mouth, it causes swelling, pain and temporary loss of speach - which explains one common name of the plant: "dumb-cane"
Special problems
Insects
Keep watch for scale and red spider mite
Stem base soft and discoloured
Stem rot disease. This condition is encouraged by overwatering and low temperatures. If damage is slight - cut out diseased area, spray with Benlate and repot. I damage is severe - discard plant; use top as a cutting.
Lower leaves yellow and wilted
Low winter temperatures or cold draughts are the most likely reason. Plants will survive at 50°-55°F but lower leaves will suffer.
Loss of colour
Direct sunlight or excessive brightness will give leaves a washed-out appearance. Move to shadier spot.
Loss of leaves
Most likely reasons are temperature too cool, dry air or cold draughts if leaves are young. Old leaves tend to drop naturally with age.
Leaves with brown edges
compost has been allowed to dry out; it should be kept moist, but not soggy at all times. Cold air can have a similar effect.
Propagation
stem cutting
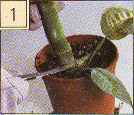
1. cut stem carefully with sharp knife
2. ensure cut is made cleanly
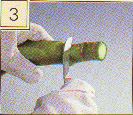
3. cut stem into 3in (7.5cm) pieces
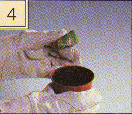
4. dust lightly with hormone rooting powder
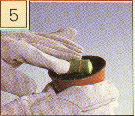
5. press gently onto compost surface

6. Ensure stem is not buried and cover with plastic bag
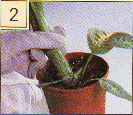
tip cutting
1. remove 4-5in (10-12.5cm) tip cutting
2. dip in hormone rooting powder, insert in 3.5-4.5in (9-11cm) pot and cover with clear plastic bag.
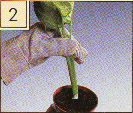
Although a number of plants are poisonous it is worth taking particular care when handling the dieffenbachia. Before starting to propagate the plant, try to wear gloves and avoid all contact with the sap due to its poisonous and violently irritating effect. Remember also to wash your hands and exposed skin, and to clean tools after the procedure.
For the best results propagate dieffenbachia from mid-spring to early summer.
Tip cuttings of 4-5in (10-12.5cm) should be cut with a sharp knife and prepared by removing any lower leaves that would be buried in the compost. The cutting should then be dipped into a hormone rooting powder and inserted in a 3.5-4.5in (9-11cm) pot of peat-based seed and cutting compost.
The cutting should be covered with a clear plastic bag and kept out of direct sunlight at a temperature of 72-75°F (22-24°C) until rooted. This can take up to two months. Remove the bag from time to time to trim off any decaying leaves to avoid the spread of a fungal rot.
Once rooted, remove the bag and commence feeding before potting on when large enough into a 5in(13cm) pot of a peat-based potting compost.
Large overgrown dieffenbachias with long bare stems may also offer propagation material in the form of the stem. This may be cut into sections measuring about 3in (7.5cm) which are gently pressed into the surface of a peat-based seed and cutting compost and cared for in a fashion similar to the tip cuttings technique. Stems will normally produce one plant, but if you are lucky and two are generated, take care to divide the stem carefully and pot up each plant separately.